toys for writers to play with, part 1: Liquid Story Binder
My friend Nina was the one to introduce me to Liquid Story Binder. I’ve been meaning to write something about this program ever since I got it, but I keep coming up blank. It’s very hard for me to put into words exactly how much LOVE I have for this program. (I know, that’s lame, but seriously people!) And it’s also hard for me to explain everything it can do… which is pretty much anything you need it to do!
I will never write anything in a Word document again. Never. Not a blog entry, not a poem, not even a freewrite-background-note. Nothing. It all goes into LSB, somewhere. And what I love about LSB is that there’s a place for everything in it. It’s more than just a word processor – it’s… well, a binder! If a binder could have just the perfect amount of pockets you wanted it to have, in the perfect order and shape, and in all your favorite colors. It can be whatever you want it to be.
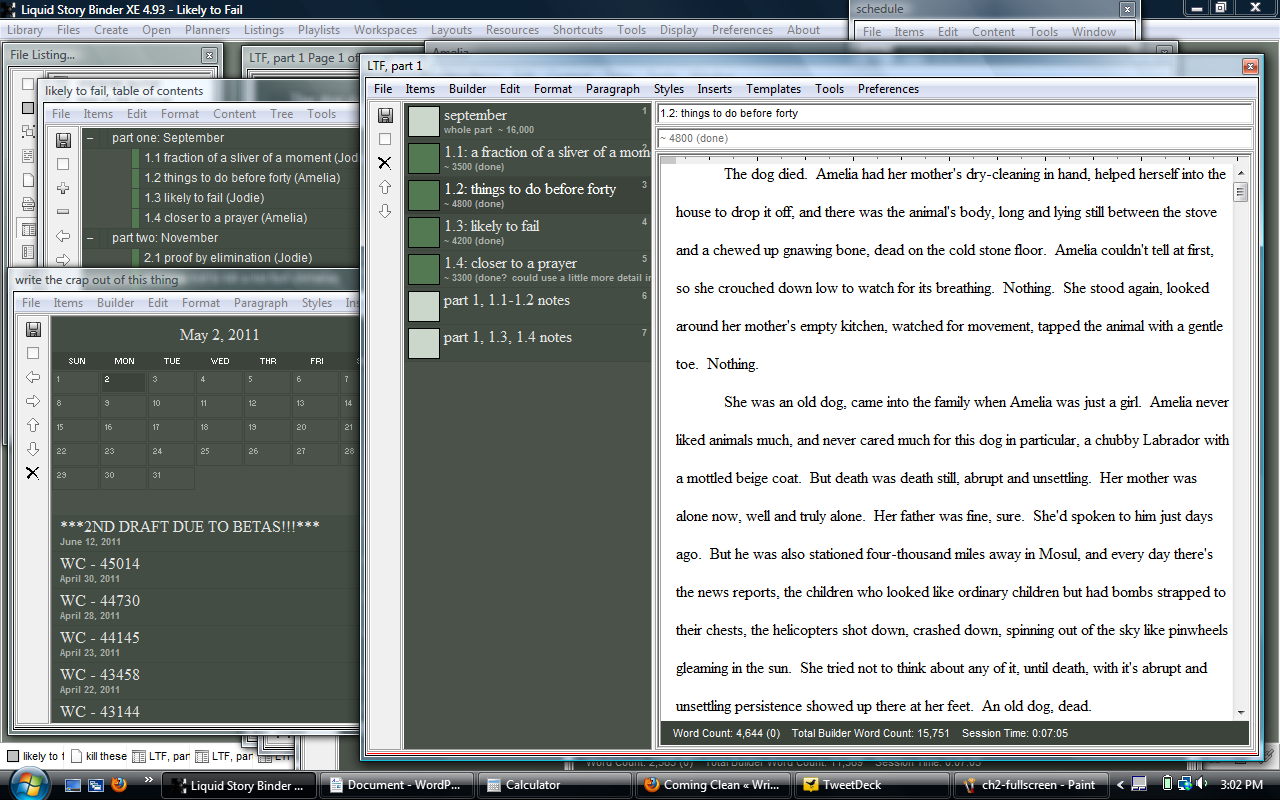
The big box on the right, called “LTF, part 1”, is called a “Builder”. The top left, partially hidden box called “likely to fail, table of contents” is using the Outline tool. The bottom left, which I’ve lovingly called “write the crap out of this thing” is the Journal tool, where I keep track of my word counts.
It’s hard to explain what these things do without you being able to get your hands on it and try it yourself, which was part of the reason I kept putting off writing about this thing, lol!
But simply, most of the time, for almost any kind of writing I do, I’ll write directly into the Builder. Each of these items in the Builder can be “built up” into a Chapter, which is simply a rich-text document. The point is though, you can use the software in any thousands of ways, and I use these tools differently for each of the different projects I’m working on, or even each stage of where I am in the process.
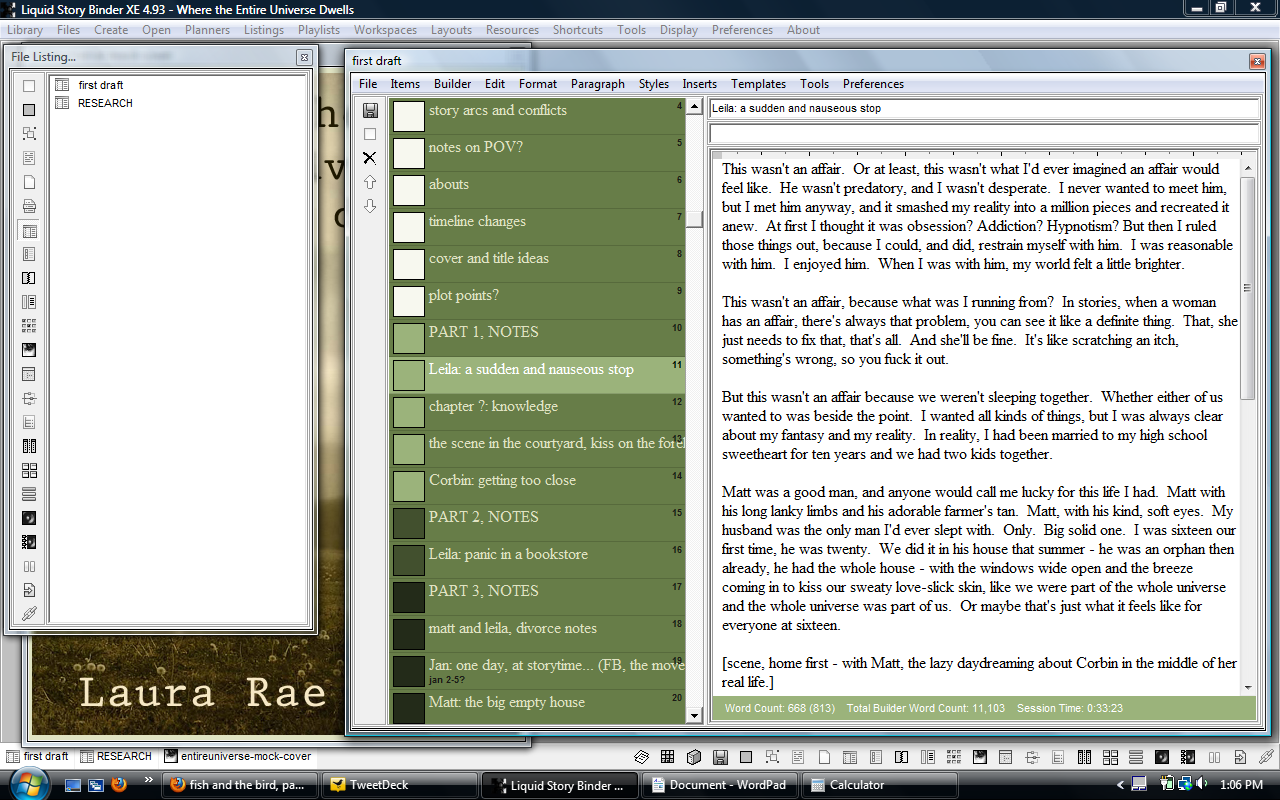
And please don’t mind the very first-drafty start to my second book, lol! What I wanted to demonstrate here is what I love best about the Builders, the ability to shuffle them around! When I’m first drafting, I write the whole thing into one big long Builder. I’ll give each scene its own item in the Builder, and it’s SO easy to move them around as I learn more about the story and what order they might appear. This is very useful to me, with the way I write my first drafts – as the scenes come to me, I don’t always know which order they go in. So here, I just write them down, sticking them vaguely towards the beginning, middle, or end, and that way I don’t have 3000 different word documents lying around, or have to have all my scenes pasted into the same long word document either.
Then as the project comes together, you can “build” all of those fragments or scenes into a chapter. You can move one item (or several items) from one builder into another. You can transform Journals into Builders, or Builders into Chapters, or Outlines into Chapters. It’s so customizable, and really does SO much! More than I’m even able to use very often, and the LSB website really does a great job of demonstrating it all.
The parts I use most often are the journals, outlines, checklists, the sequences for my photo-poems, and have even begun to use the character dossiers now too.
A few more of my examples, all from different projects:
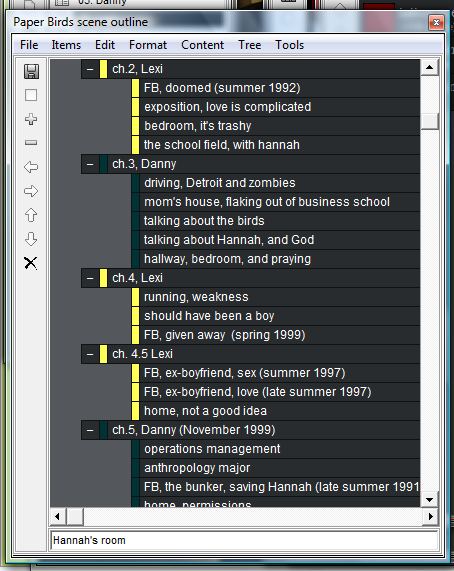
An Outline, where I have each chapter detailed by scene, and color-coded by its narrator! (Another love about LSB, almost EVERYTHING can be color-coded!!!)
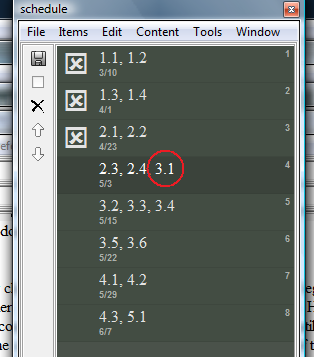
This is a Checklist, which I find useful for laying out my deadline schedules. (Don’t mind the red circle – I was just getting giddy a little bit over the 50% point, which I’m currently at! Yay!)
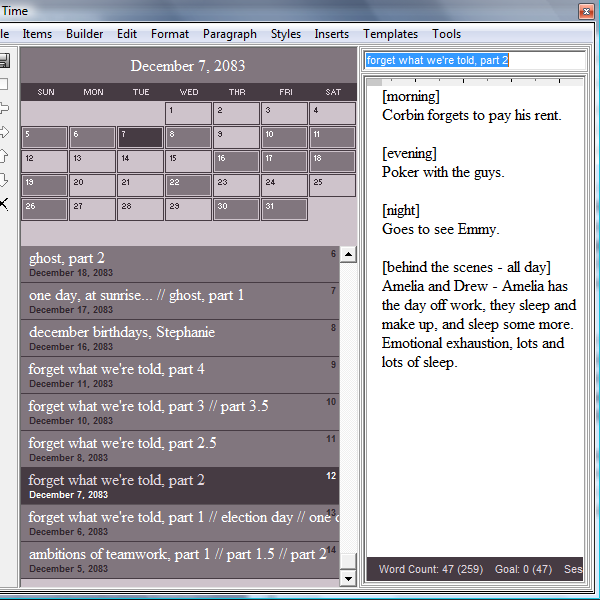
This one is the Journal, except instead of using it to write about the process and track word counts as I have in the first screenshot, this one is a STORY journal. Here I’ve detailed the scenes of a story in story-time, which is useful for big and complicated stories if you want to remember what your characters were doing (or couldn’t have been doing) on which days. I was quite pleased to see that LSB can go forward all the way to the year 2083, lol!
So those are the parts I use most, but that’s truly only a fraction of everything it can do. There is quite a steep learning curve (took me about two weeks to really get the hang of it), but after that, I never looked back! It’s currently about $45 to buy (free for 30 days to try out). And of course, I highly recommend (= am deeply in love with) it. Especially if you love organization and color-coding like I do! 😀
